Email Applicant
|
EMAIL APPLICANT |
||
| 1 - Select Records | ||
|
If not already selected, select Records from the top menu: (If using the legacy inteface, ignore this step). |
||
|
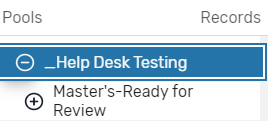
2 - Select the Pool Folder |
||
|
Select a pool folder (left side of view) to see a list of application records: |
||
|
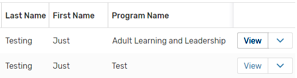
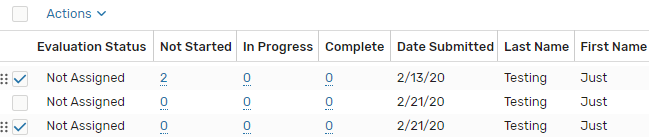
3 - Choose the Record(s) |
||
|
To Email one applicant: Choose an application record from the list; click View.: (In the legacy interface, double-click on the record to open the record. Click the email icon at the top-right, then jump to step 6). To Email multiple applicants: Click the checkbox for each applicant you wish to email:
|
||
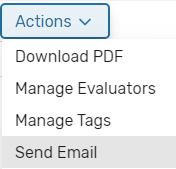
| 4 - Open the Email feature | ||
|
Select Actions, choose Send Email: (If you have the record open to email one applicant, the list of Actions may be shorter. If using the legacy interface, after choosing the action, jump to step 6). |
||
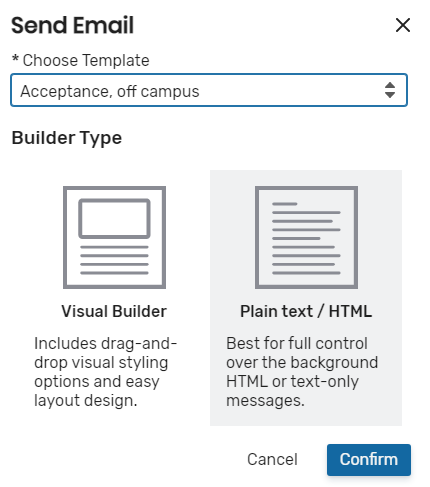
| 5 - Select a Template or New Message | ||
|
Use Existing Template: If you have a an existing email template, choose it from the drop-down option, then click Confirm. Use New Message: Select Visual Builder or Plaintext /HTML (recommended). Click Confirm. |
||
| 6 - Add Conent | ||
|
Enter your subject (if needed) and type out/paste your email message content. When you're done, click Next. (If you're using the legacy interface, select your template here or compose your message. Be sure to complete the header information, then jump to step 8). |
||
| 7 - Sending Details | ||
|
If necessary, enter a From email address and From name. Always use ...@ksu.edu for the from address. When you're done, click Next. Note: (Updated Interface) Enter a Template Name and click Save to Templates to save the message to your template library. |
||
| 8 - Preview and Send | ||
|
Preview the message. Use the Previous option to return to previous screens if you need to make changes. (If you're using the legacy interface, select Preview to see a message preview. Click Preview again to cancel the preview). When you are ready to send the message(s) click Send. |
||
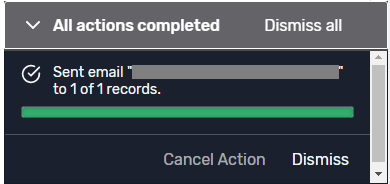
| 9 - Confirmation | ||
|
A confirmation dialog will confirm that the message has been sent. |
||