Creating a new event
Signing in
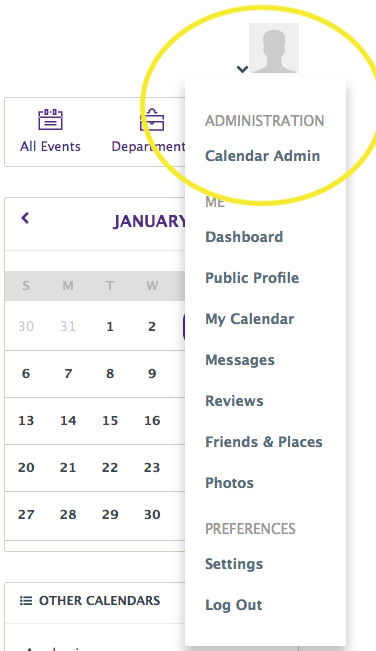
- From the profile drop down, select Calendar Admin.
Page 1: Basic information
- Gather the information for the event. The required fields for our calendar system are:
- Event Name
- Start Date
- Location
- Department (this is the college, program, department, etc.)
- Event description
- Other information in the form is valuable but not necessary for the event widgets throughout the website.
- From the Events dropdown in the left hand menu, choose Add Event.

- Enter the title of the event. Choose a title that is clear and can stand alone in the university calendar listing.

- Set the Start Date. You can enter dates in a variety of formats, such as 3/24/2019, Tomorrow, or next Wednesday. Click add above to schedule to set more than one date.

- Typing an location name will auto-suggest locations. Be sure and select a location that's already been entered into the system. You can select the Use: option if one doesn't exist.

- Scroll to the bottom of the first page to find the Department field. Select the appropriate group from the drop-down list.
- Note: At least one Department must be selected for the event. If the event is published without a Department, you will lose access to edit the event.

- Continue to the next page of the Event creation by clicking the Save and continue button.

Page 2: Details
- Add a description for the event. Don't duplicate the time, date or location. Please be descriptive enough to convey the scope of the event.

- Optional: Add an event photo. If you don't include an image, a default one will be added for you according to the event type.

- Optional: Add other event details for the event page. Speakers, hashtags, event websites and vanity URLs provide additional information for SEO and social sharing.

- Continue to the next page of the Event creation by clicking the Save and continue button.
Page 3: Tickets & registration
- Localist Register is selected by default. If you intend to use a different ticketing or registration system or don't wish to have a registration page at all, deselect this box.

- With Localist Register deselected, you can see other ticket information for ticket cost information, other registration URL and the Eventbrite ID. Input any relevant information for your event here. If it does not apply, skip to the next page.

- Continue to the next page of the Event creation by clicking the Save and continue button.
Page 4: Attendee engagement
- No action is required here.

- Continue to the next page of the Event creation by clicking the Save and continue button.
Page 5: Publish
- Except in specific instances, you should leave the visibility and status as the default option. Exceptions are: to restrict events to specific widgets or pages, to change an event to canceled or sold out or to change standard promotion.

- Select Save to save without publishing the event to the calendar pages. Select Save & publish to publish the event to the calendar systems.

