Photoshop tutorials
Black and white photo conversion |
 |
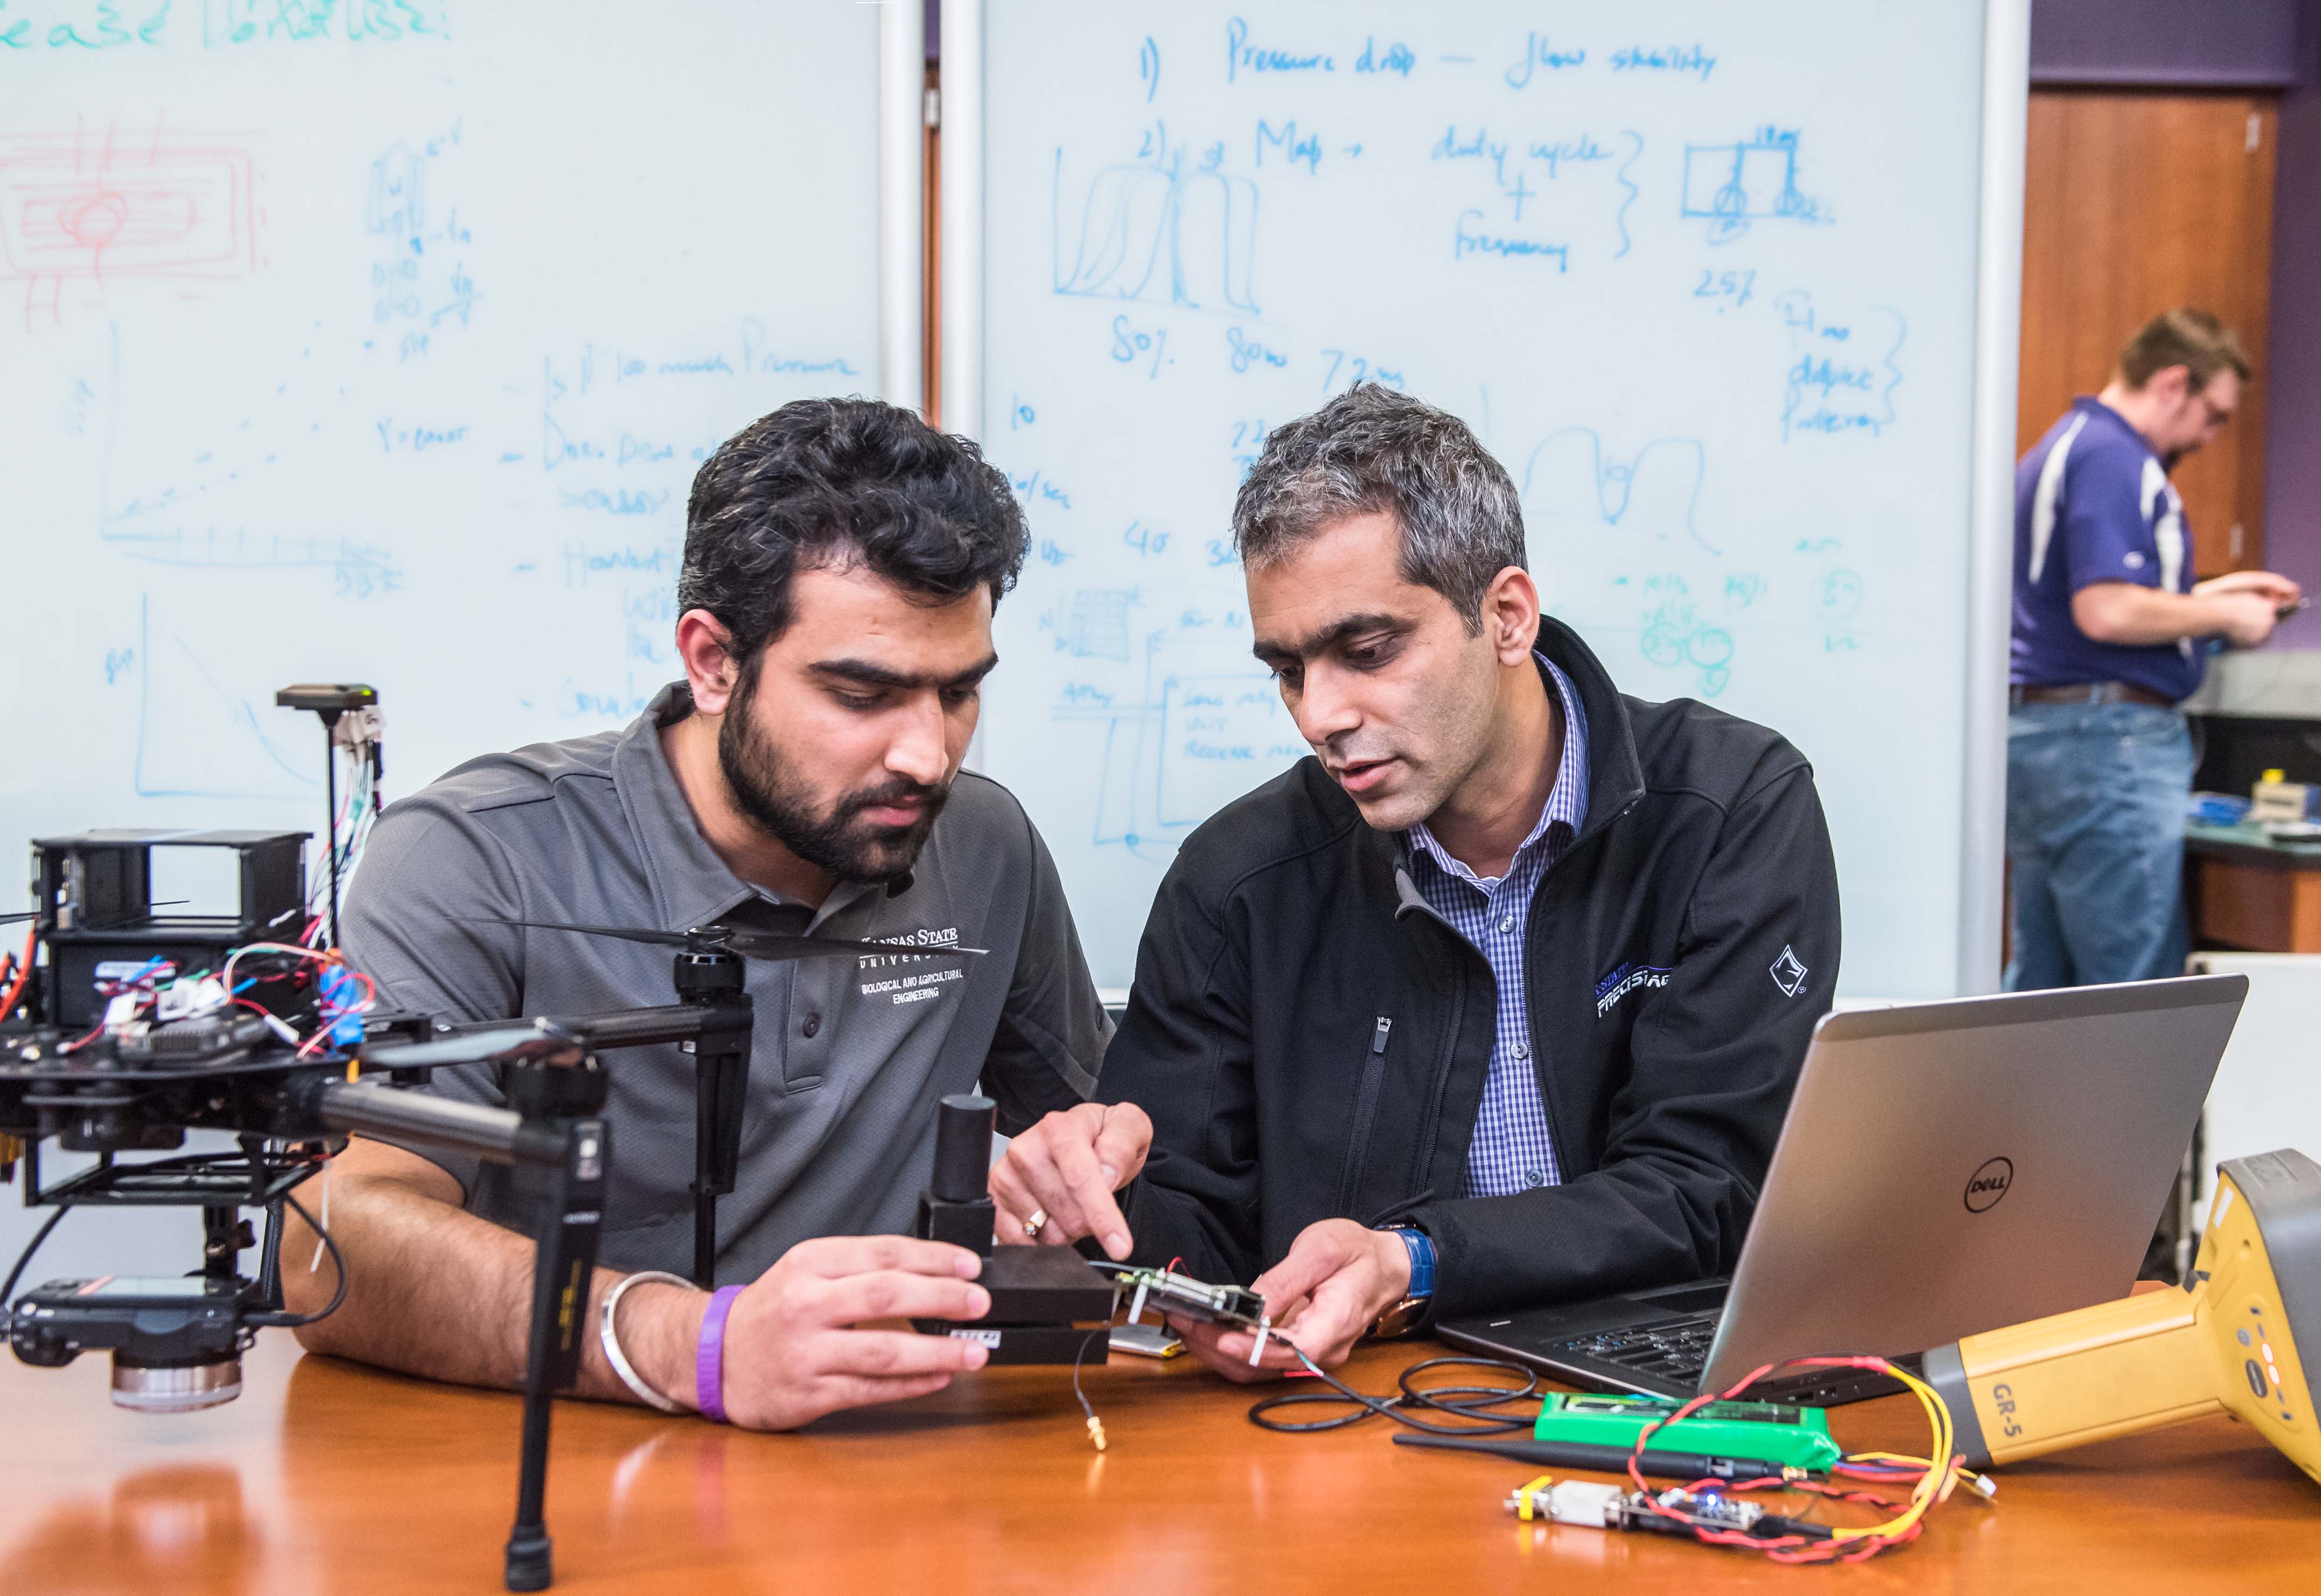
I have chosen this photo from Biological and Agricultural Engineering.
Some of the reasons I have chosen this photo for our newest campaign:
- It shows a student hard at work with great focus
- Shallow depth of field to minimize distractions from the subject
- Open area above or to the side of the subject to overlay text
If you are using Lightrroom, here is a preset. You will need to make adjustments per photo, but this should get you in a good starting place.
Download Here
If you are using Photoshop, here is a action you can import. This will walk you through these steps to achieve this look.
Download Here
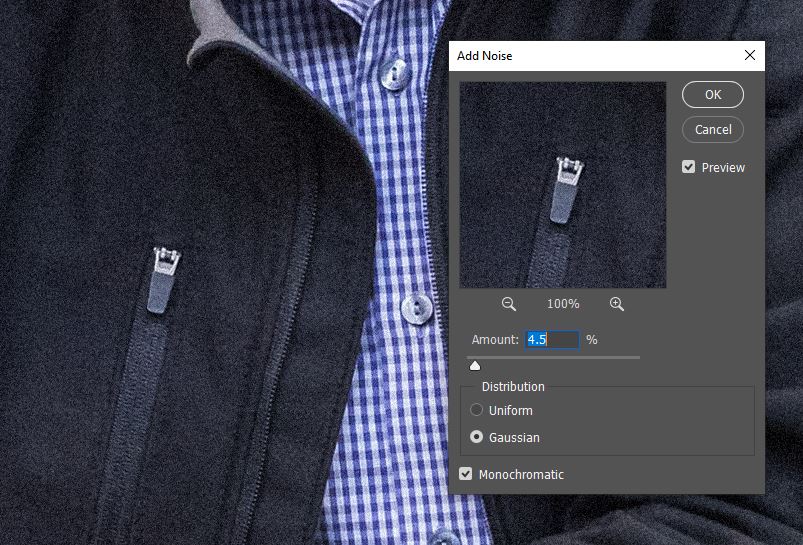
Our first step is to add a bit of grain to the photo. This will help add to the authenticity to the photograph.
- Duplicate your current layer to make a copy that we can edit without being destructive. (Layer -> Duplicate Layer)
- Select the new, "Background copy" layer.
- Add noise filter. (Filter -> Noise -> "Add noise..."
- This will bring up a dialog menu, You will want to use Gaussian distribution as well as have Monochromatic selected. For this image, I chose 4.5% for the amount, this could change depending on the size of your image.
Our next step will be to convert to black and white.
- Make sure we still have the "Background copy" still selected in your layer pallet.
- Create a new adjustment layer. (Layer -> New Adjustment Layer -> "Black & White...")
- You then will see a new pallet on the right side, adjust the sliders to modify the brightness levels of each color. Adding contrast to the subject, and minimizing contrast of the background can help keep the focus on the subject.

Our last step is to lighten the darker tones of the image.
- Create a contrast adjustment layer (Layer -> New Adjustment Layer -> "Brightness/Contrast...")
- For this image, I pulled the contrast back slightly to -5.

After these steps, you should have something similar to this image.

If you have any questions, don't hesitate to reach out to Photo Services (photo@ksu.edu)
