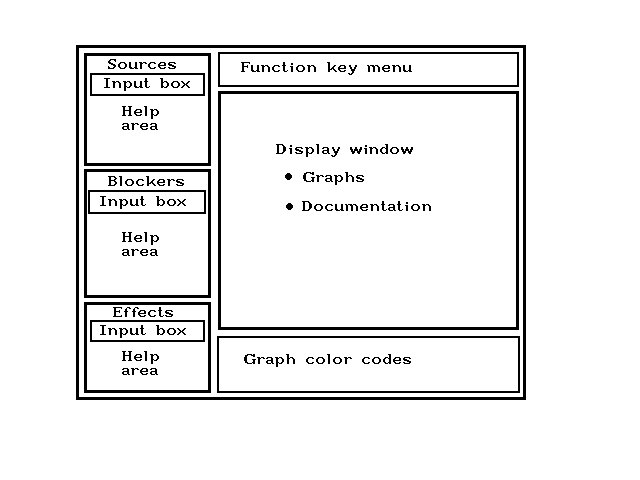
Figure 1: UVRISK screen layout
Return to the Chapter